How to set up Smartproxy on AdsPower
Smartproxy is a premium proxy and web scraping infrastructure providing the best value-for-money products to its users. Smartproxy provides best-in-class residential and data center proxies for projects of any size for affordable price.
In this post we will go through how to use Smartproxy on AdsPower. Let's go!
Creating a new browser profile
1. Open up the AdsPower app and press on the "New profile" button, to enter the profile setup page.

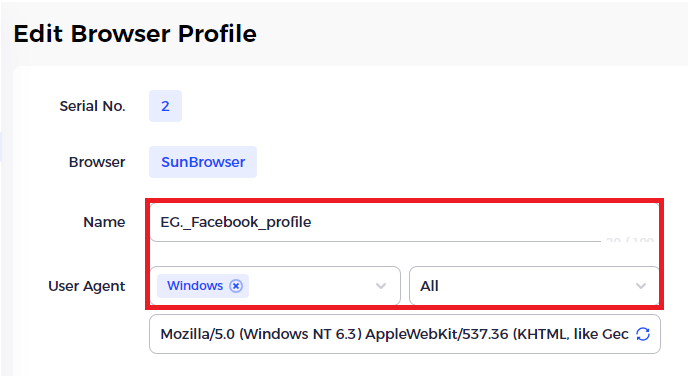
2. In the "Name" field, type in what you would like the profile to be called. Select the preferred device type for your profile, in the "User Agent" dropdown menu.
Proxy setup
1. In the "Proxy type" section press on the dropdown menu and select the HTTP as the proxy protocol.
2. Fill in text fields for Proxy Type, Proxy Host, Proxy Port, Proxy User, and Proxy Password as in the example below.
- If you're located in mainland China, use HTTPS (china-gate.visitxiangtan.com:8000, or see more here)
- To set up your username and password that you will be using in the setup - please refer to this setup guide.
- This guide will help you get the proxy host address and port for your target country.

3. If you are using the HTTP protocol, you can check if the proxies are working by pressing the "Check Proxy" button next to the Proxy Host field.
If you have the proxies set up using HTTPS protocol, you will not be able to check them in the setup page, however you will be able to do so at the Checking the proxy IP / connection step.
Information section
1. In the "Account Platform" dropdown menu, you can select the website you will be accessing with the Browser Profile.

2. Once the platform is selected, you can enter the Username and Password to the respective fields, this will automatically fill the login information fields on the site, every time you open the profile you are creating.
3. In the "Advanced" section you can select up any specific fingerprint settings for your browser profile your application requires.
4. After you have set up all your preferences in the setup page, press the OK button on the bottom of the window to save the profile setup.
Checking the proxy IP / connection
1. In your Profiles tab you will see the profile/profiles you have created, press the open button to launch the browser profile.
2. Once the profile launches, the first tab will show your proxy IP, and check the connections to a few sample sites. This is an example of what you should be seeing:
Do not worry if the Google domain is showing up as inactive, as Smartproxy do block a number of sites with their proxy services. If you need access to a blocked site, you can always contact their support team via live chat, to request an unblock.
After this, you should be set up and ready to use Smartproxy with AdsPower.

People Also Read
- Earn Big with AdsPower: Create Tutorials and Win Up to $400!
- The Power of Popunder Ads: When and Why to Use Them in Campaigns
- How to Use Proxies for Web Scraping Without Getting Blocked
- AdsPower Enhances Security with Bug Bounty Program and New BugRap Partnership
- Super Easy-to-Use Residential Proxy Sharing: Quick Start with Cherry Proxy


